WinRiver II Main Screen
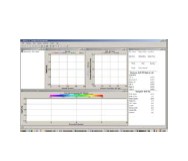
WinRiver II is the software used to set configurations, collect data with StreamPro and Workhorse Rio Grande, and playback previous transects.
Configure
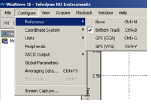
On the Configure menu, click Reference.Select the desired reference: None,Bottom Track, GPS (GGA), or GPS (VTG).
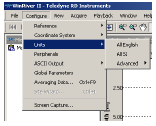
To change the units for all displays, on the Configure menu,select Units.

On the Configure menu, click Averaging Data… Enter a number greater than one to average the data.

Site Information:Enter the Site Information.Enter a Station Name and Measurement
Number
(alphanumeric).
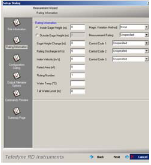
Rating Information:Enter the Rating Information.

Configuration Dialog:Enter your choices for how the configuration will be setup.
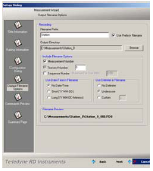
Output Filename
Options:Use the Output Directory field to select where the data file will be stored.Check the Measurement Number box to add it to the file name.

Commands Preview:The Commands Preview is where adjustments can be made to the commands produced by the measurement wizard.

Summary Page:Review the Summary Page. When done, click Finish.A green check mark next to WM12 and BM7 means that the ADCP is capable of using these modes, not that the mode is selected.
Aquire

Step 1:
On the Acquire menu click Start Pinging or use the shortcut key F4.
Step 2:
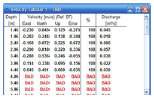
Click View, Tabular, Velocity to open a Velocity Tabular 1 display. Move out from the shore until the water is deep enough to consistently show good values for two bins. Mark this position as starting/stopping position.

Step 3:
Starting at one of the edge positions determined. On the Acquire menu click Start Transect (F5) to begin recording.

Step 4:
When prompted, enter the beginning distance to the bank and determine if this is the left or right bank. When facing downstream, the left bank is on your left side. Click OK to start.

Step 5:
Hold this start position and view the Composite Tabular display. Check if the Nmb. of Ens. minus any Bad Ens. is more (or equal) to the number of shore ensembles (the default is 10 shore ensembles).
Step 6:
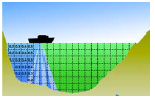
Move across the river as smoothly as possible. For the best measurement results, the boat’s speed over the bottom should be no greater than the water speed of the river.

Step 7:
Continue across the river until you reach the stop position determined. Stop at this position and wait for the Shore Ensembles measurements to be recorded.

Step 8:
Press F5 to stop recording. When prompted, enter the ending distance to the bank.

Step 9:
Check Bad Ensembles and % Bad Bins. The number of Bad Bins should be less than 25%.
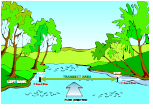
Repeat step 3 to 9. An even number of at least four transects that agree with each other to within 5% of the mean of all the samples are recommended. When you are finished acquiring the data, press F4 to stop the ADCP pinging.
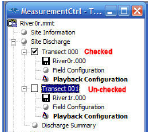
To playback a data file,use the Playback menu and select Reprocess Checked Transects (click the check box to select the files). This will create a copy of the Field Configuration node and creates a Playback Configuration node.

On the Playback menu,click First Ensemble to go to the beginning of the data file. Click Play to review the data.
To quickly play through the data, on the Playback menu, select Slider or drag the ensemble marker on the contour plot.

To change the data screening for a selected data file, right-click on the Playback Configuration node and select Properties.Select the Processing page. Change the settings as needed. Click OK. The selected data file will playback automatically.
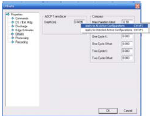
If the change applies to multiple Playback Configuration nodes, then right click the edited item (Apply to All Active Configurations or Apply to Checked Active Configurations).
Producing Area:Germany